Overview: What the Process Looks Like
Getting a home EV charger installed in Ireland involves more steps than simply buying a charger and mounting it on the wall. There is a regulatory pathway — SEAI grant pre-approval, installation by a Safe Electric registered electrician, ESB Networks notification where required, and post-installation certification — that all happens in sequence.
The good news: a competent installer manages most of this for you. Your job is to understand what is happening at each stage, prepare your home for the visit, and submit the SEAI grant claim once the installation is complete.
Here is the complete step-by-step process.
Step 1: Research and Choose Your Charger
Before contacting installers, decide on the broad type of charger you want:
- Tethered or untethered? (tethered is more convenient for single-EV households)
- 7.4 kW (standard) or 22 kW (if you have three-phase supply)?
- Smart features priority? (Zappi for solar, Ohme for tariff automation, Easee One for load management ecosystem)
Check the SEAI approved product list at seai.ie to confirm your preferred model qualifies for the €600 grant.
Step 2: Apply for the SEAI Grant
Critical: You must apply before installation begins. SEAI does not accept retrospective applications.
Apply at seai.ie/grants with:
- Your MPRN (Meter Point Reference Number — on your electricity bill)
- Your vehicle registration number (EV or PHEV)
- Property address and contact details
- Provisional installer details (you can add these later if still choosing)
SEAI typically approves applications within 1–5 working days. You will receive a grant approval reference by email. Do not commission the installer until this approval is in hand.
Step 3: Get Quotes from Registered Installers
Request quotes from two or three Safe Electric registered EV charger installers. The quote should include:
- Charger model (confirm it is SEAI-approved)
- Labour for the installation (circuit, consumer unit work, charger mounting)
- Any consumer unit upgrade if required
- Explicit confirmation that the installer is Safe Electric and SEAI registered
A reputable installer will offer (or require) a site survey before quoting. Beware of quotes issued purely over the phone — a good installer needs to see the property.
How to find registered installers: SEAI maintains a list of registered EV charger installers at seai.ie. Safe Electric also has a contractor search at safeelectric.ie.
Step 4: Site Survey
Once you select an installer and before the installation day, a site survey is carried out (either by the installer in person or the same visit as the installation for simple cases). The survey covers:
- Consumer unit assessment: capacity for new 32A RCBO, age and type of board
- Cable route planning: internal or external, length, routing challenges
- Charger position: optimal mounting height (typically 1–1.2m above ground), distance from parking position
- ESB Networks notification assessment: required for chargers above 7 kW
- Earthing system: verifying TN-S, TN-C-S (PME), or TT system — affects protection device choices
The survey informs the final quote. Allow 30–60 minutes.
Step 5: ESB Networks Notification (If Required)
For chargers above 7 kW (i.e., 11 kW or 22 kW three-phase units), your installer must notify ESB Networks before installation. They do this using your MPRN and the charger specifications.
ESB Networks has a standard timeline of 5–10 working days to respond. In most cases it is approved without further action. In some cases ESB Networks may request additional information or (rarely) require a site visit.
For 7.4 kW single-phase chargers, no ESB Networks notification is required in most standard residential installations.
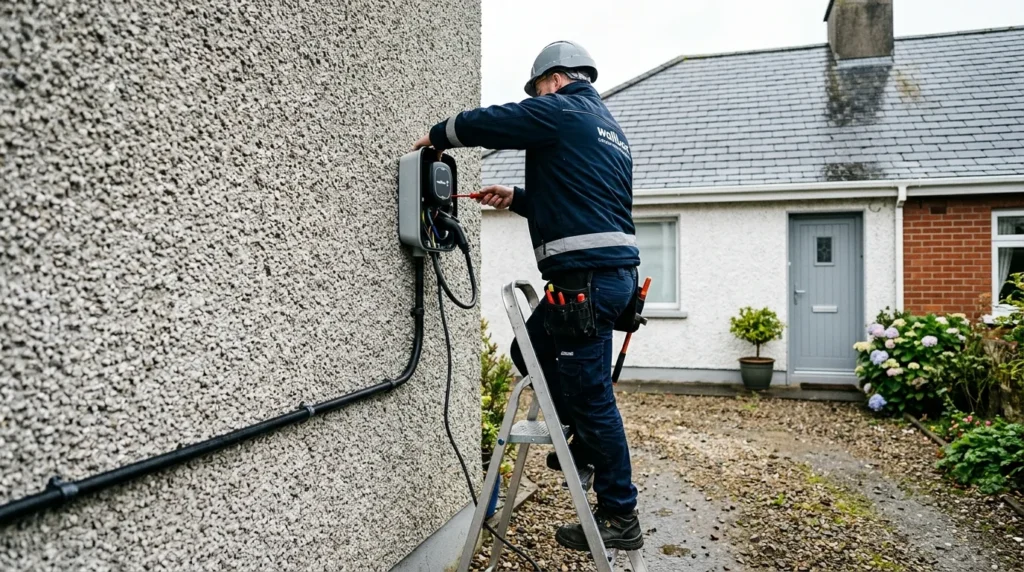
Step 6: Installation Day
A standard 7.4 kW driveway installation takes 4–6 hours for an experienced electrician. The sequence typically runs:
Morning: Consumer Unit Work
- Isolate supply at meter (electrician contacts ESB Networks if a supply isolation is needed)
- Open consumer unit — identify available capacity
- Install new 32A Type B RCBO (or MCB where existing RCD is present)
- Mark and confirm cable route
Mid-Morning to Lunchtime: Cable Run
- Run 6mm² twin-and-earth cable (or 6mm² SWA armoured for outdoor sections) from consumer unit to charger location
- Protect cable in conduit or surface trunking as required
- Pass cable through external wall via weatherproof gland if external installation
Afternoon: Charger Installation and Testing
- Mount charger backplate on wall (rawl bolts into blockwork through pebbledash)
- Connect cable to charger terminals
- Connect cable at consumer unit
- Testing: insulation resistance, earth continuity, polarity, RCD trip time
- Commission charger via installer app or manual procedure
- Test charge with the EV (plug in, confirm pilot signal, verify charging begins)
End of Day: Documentation
- Complete Safe Electric Record of Electrical Completion (REC) — the completion certificate
- Hand over REC and charger documentation to homeowner
- Walk through app setup and scheduled charging configuration
Step 7: SEAI Grant Claim
After installation, log into the SEAI portal and upload:
- The installer’s invoice (showing charger model and installation costs)
- The Safe Electric REC (completion certificate)
SEAI will review the documentation and process payment to your bank account within 3–6 weeks of a complete submission.
Step 8: Tariff Optimisation
Once the charger is installed and tested:
- Download the charger app and create an account
- Configure scheduled charging to your night-rate tariff window (e.g., 23:00–07:00)
- Switch to an EV night tariff if you have not already — Electric Ireland Night Boost, Bord Gáis EV Tariff, Energia Smart Drive, or SSE Airtricity EV (all approximately 12–15 c/kWh overnight in 2026)
- Request a smart meter from ESB Networks if not yet installed (required for time-of-use tariffs)
What to Prepare Before Installation Day
- Clear access to the consumer unit (clear any storage blocking the board)
- Agree the cable route with the installer — if you want to avoid visible trunking, make decisions before cables are run
- Confirm parking position so the installer mounts the charger at the correct location and height
- Have your Wi-Fi password ready for charger commissioning
- Ensure someone is home — the installation requires access to the interior and the electrician will need to isolate and reinstate the supply
Total Timeline: Enquiry to Charged Car
Installation booking (wait)
Total from start to grant paid
The installation itself is fast. The administrative and scheduling process is where most of the calendar time goes. Apply for the SEAI grant and start getting quotes simultaneously to minimise total wait time.